



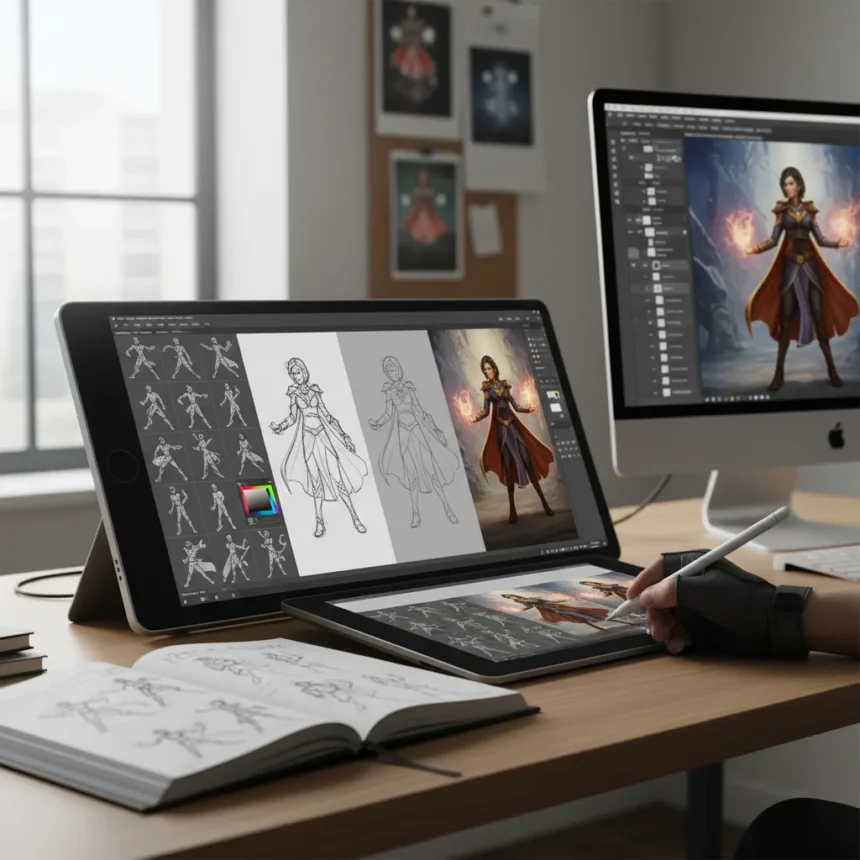
Photoshop character design doesn’t require reinventing the wheel—it requires a structured approach from rough thumbnails to polished render. Concept artist Fano Rakotoh breaks down a complete workflow that transforms a blank canvas into a finished character illustration through deliberate layering, refinement, and attention to light and shadow.
Key Takeaways
- Start with quick pose thumbnails focusing on silhouette and energy, not anatomy.
- Choose the strongest pose based on movement and mood before refining details.
- Use layer organization and Photoshop tools like Multiply and clipping masks to streamline the process.
- Build depth progressively through shadow placement, edge softening, and atmospheric glow.
- Finish with small surface details like buttons, seams, and fingernails for polish.
Why Pose Matters More Than You Think
The first mistake many character artists make is diving straight into anatomy. Fano Rakotoh’s approach flips this: start with rapid pose sketches that prioritize silhouette, energy, and movement over anatomical precision. These thumbnails are rough—no rendering, no detail work, just gestural marks that explore how the character occupies space and what mood the pose conveys. The goal is to lock in the strongest pose before investing time in refinement.
In the example workflow, pose number three was selected because it best conveyed movement and an energetic mood. This wasn’t arbitrary. The pose communicated the character’s personality and intent at a glance, which means every subsequent layer of work—anatomy, clothing, shading—would serve that core idea rather than fighting against it. Choosing the wrong pose early means reworking everything later. Choosing the right one accelerates the entire pipeline.
Building Precision: From Rough Sketch to Final Line Art
Once the pose is locked, Photoshop character design shifts into refinement. The rough sketch layer is lowered in opacity and a new layer is created on top for cleaner linework. This technique lets you trace over your own rough work without erasing it—if you need to reference the original gesture, it’s still there underneath. The second pass defines key body elements and proportions without obsessing over small details yet.

The final sketch layer is where outfit contours, hairstyle, accessories, and clothing folds come into focus. This is the moment to make decisions about silhouette clarity and readable shapes. Clean, precise lines at this stage make the colouring phase dramatically faster because the boundaries between shapes are already established. Fano Rakotoh keeps this linework tight enough that the sketch layer will remain visible during colouring—it acts as a guide, not a crutch to be hidden.
Layering Strategy: Colour, Shadow, and Separation
Photoshop character design relies on intelligent layer organization. Once the sketch is finalized, the sketch layer is set to Multiply mode so the lines remain visible as colour is applied underneath. A new layer is created below the sketch for base colour fills. Small details—like a star pattern on the socks—are kept on separate layers rather than painted directly, allowing for easy revision or adjustment without affecting the base work.



Shadows are built on their own layer using a soft round brush and a clipping mask, which constrains the shadow strokes to the colour layer beneath. This separation means you can adjust shadow intensity, hue, or coverage without repainting the base colour. After shadows are placed, the layers are merged and the Smudge tool is used to soften edges and transitions, blending the hard shadow edges into more natural gradations. Remaining sketch lines are then removed, cleaning the drawing and refining the shapes for a more polished appearance.
Depth Through Light, Atmosphere, and Reflection
A character floating on a white background looks flat. Adding depth requires continuing to work on light and shadow beyond the initial shadow layer, but before worrying about material differences like fabric texture or skin pore detail. Fano Rakotoh adds a soft atmospheric glow around the character to help it integrate into the background. The background colour is sampled with the Eyedropper tool and lightly painted around the figure with a soft, low-opacity brush, creating a subtle halo that anchors the character in space.
Reflected light—the secondary light bounce that appears on shadowed surfaces—is added to both skin and outfit. This technique prevents shadows from appearing dead or lifeless. A reflected light source typically pulls from a complementary or analogous colour to the main light, creating visual interest and suggesting that light is bouncing around the scene. This step is often overlooked by beginners but is the difference between a character that reads as three-dimensional and one that looks flat.
Finishing: Small Details That Signal Completion
The final phase of Photoshop character design is about surface details. Shoelaces, buttons, seams on the jeans, fingernails—these are the small marks that signal a finished illustration rather than a rough render. They are painted last because they are the easiest to add and the hardest to plan for. Waiting until the end means you are adding them to a fully shaded, atmospheric foundation, so they read as part of the final image rather than afterthoughts.



This stage also requires restraint. Not every surface needs texture or detail. The eye naturally gravitates to areas of high contrast or fine detail, so placing these marks strategically—on the face, the hands, the focal points of the outfit—draws attention where it matters. Overdetailing everywhere dilutes the impact and exhausts the viewer’s eye.
How long does a Photoshop character design typically take?
Timeline depends on complexity and artist experience. A polished character design following this workflow—from thumbnails to final render—can range from a few hours for a stylized character to a full day or longer for a highly detailed realistic render. The structured approach Fano Rakotoh uses minimizes wasted time by locking in decisions early and building in layers, so iteration is faster than painting everything from scratch.
Should I use separate layers for every element?
Layer organization is a personal choice, but the workflow described here emphasizes separation for flexibility. Keeping base colour, shadows, details, and effects on different layers means you can adjust one without affecting others. Beginners often benefit from this approach because mistakes are isolated and easier to fix. As you develop confidence, you may merge layers earlier to work more intuitively, but the principle remains: organize in a way that lets you revise without repainting.
What’s the difference between this workflow and painting directly?
Direct painting—working mostly in one layer with minimal separation—can be faster and more intuitive for experienced artists who know exactly what they want. Fano Rakotoh’s layered approach prioritizes control and iteration, making it ideal for character design where decisions about pose, proportion, and lighting often shift during production. The structured method is also more forgiving for artists still building confidence in their choices.
Photoshop character design is not a single technique—it is a philosophy of building complexity through deliberate simplification at each stage. Start with the strongest pose, refine the lines, block in colour, define shadow, blend and polish, add atmosphere, and finish with detail. Follow this sequence and your character will feel complete rather than rushed, professional rather than amateur. The polish comes from patience and layering, not from raw skill alone.
Edited by the All Things Geek team.
Source: Creativebloq