


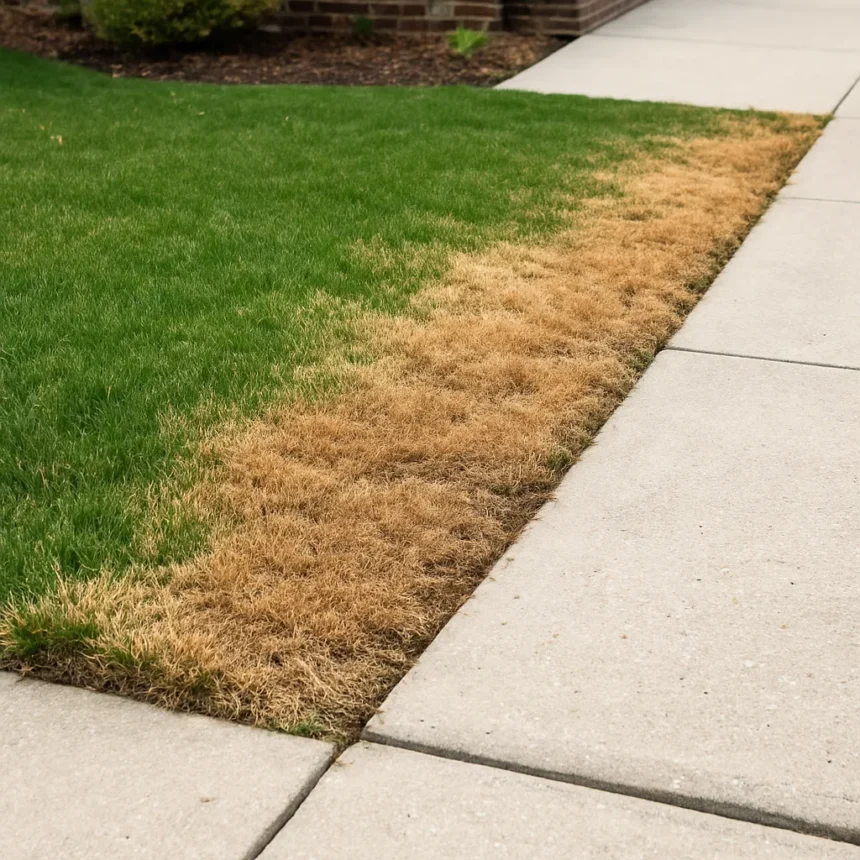
Winter salt lawn damage refers to the browning, root burn, and soil degradation caused when de-icing rock salt leaches into turf along driveways, sidewalks, and roadsides. It’s one of the most common spring lawn problems in northern climates, and right now — as soil temperatures climb and the first rains arrive — is exactly the right moment to fix it. The good news: most salt-damaged lawns are recoverable with a clear three-step process.
TL;DR: Winter salt lawn damage burns grass blades, damages roots, and desiccates turf tissue. Flush the area with water, apply gypsum at 20–40 pounds per 1,000 square feet, then overseed bare patches once soil hits 55°F. Minor edge damage may self-repair with spring rain alone.
Why does winter salt damage your lawn so badly?
Salt damages grass through two mechanisms: it physically desiccates leaf and crown tissue, and it disrupts soil chemistry in ways that reduce drought resistance and increase disease vulnerability. Icy roads can accumulate up to nearly 2 pounds of salt per square foot over a single winter, and that salt doesn’t stay on the road — it leaches directly into adjacent turf.
The damage pathways are varied. Salt gets shoveled or plowed onto lawns, carried by traffic spray, or deposited through snowmelt runoff. Overapplication and repeated freeze-thaw cycles make the problem worse each season. By the time spring arrives, what looks like a simple brown patch is often a stretch of chemically stressed soil where grass roots have been compromised at the cellular level.


Here’s the practical upshot: the longer you wait, the harder recovery becomes. Salt that sits in soil through a dry spring compounds the damage. Early action — ideally as soon as daytime temperatures stabilize — gives your lawn the best chance.
How to fix winter salt lawn damage in three steps
Repairing winter salt lawn damage starts with flushing, not seeding. Throwing seed onto salt-saturated soil is a waste of time and money — the salt will kill new growth before it establishes. Work through the steps in order.


Step one is water flushing. Use a gentle rain-pattern setting on your hose and soak the affected area repeatedly over several days. The goal is to push salt concentration below the root zone, not just wet the surface. Deep, repeated flushing is what moves salt through the soil profile. One homeowner in Traverse City, Michigan — Ryan McCallister — used gypsum combined with two rounds of water flushing, and reported new growth appearing within three weeks.
Step two is gypsum application. Gypsum (calcium sulfate dihydrate) chemically neutralizes sodium chloride in the soil, displacing the sodium ions and making them easier to flush out. Apply at 20–40 pounds per 1,000 square feet according to product instructions, then water deeply again to activate it. This step is what separates a proper repair from a temporary fix that browns out again by midsummer.
Step three is overseeding. Before you seed, remove dead turf, rake to loosen the soil, and check that soil temperature has reached at least 55°F — below that threshold, germination is unreliable. Apply grass seed at roughly 15–20 seeds per square inch, mix in compost and a starter fertilizer, rake lightly for seed-to-soil contact, and cover with a thin layer of peat moss or hay to retain moisture. Keep the top layer consistently moist until roots establish, then mow at 3–4 inches once growth is underway.
Which grass seed works best for salt-prone areas?
If your lawn sits alongside a road or driveway that gets salted every winter, standard turf varieties will keep struggling. Salt-tolerant species — specifically slender red fescue, strong creeping red fescue, and tall fescue — are far better choices for re-establishing these areas. They won’t make your lawn immune to salt, but they’ll recover faster and degrade more slowly with annual exposure.


For large bare areas, seeding is the practical choice: it’s cheaper and manageable at scale. For small or irregularly shaped patches, sod is worth considering. Sod establishes faster, suppresses weeds during recovery, and gives a cleaner result — though it costs more and requires more precise fitting around edges. Neither option is universally better; it depends on the size and shape of the damage you’re dealing with.
Can you prevent winter salt lawn damage next season?
The most effective prevention is switching away from straight rock salt (sodium chloride). Potassium chloride, calcium magnesium acetate, magnesium chloride, and brine or treated rock salt all cause meaningfully less lawn damage while still handling ice effectively. They’re generally available at hardware and garden stores and are worth the modest price difference if you’re already spending time and money on spring repairs every year.
For lawns with minor edge damage — just a few inches along a path — spring rain alone may flush enough salt to allow natural recovery without any intervention. Don’t overseed or apply gypsum until you’ve given the lawn two to three weeks to show what it can do on its own. Active repair is for persistent or extensive patches, not every brown edge you spot in March.
Is gypsum safe to use on all lawn types?
Gypsum is broadly safe for established turf and is not harmful to pets or soil biology at the application rates used for salt remediation. Apply it according to product instructions — typically 20–40 pounds per 1,000 square feet — and water it in thoroughly. It won’t over-correct your soil pH the way lime can, which makes it a lower-risk intervention than many homeowners expect.
How long does it take for a salt-damaged lawn to recover?
Recovery time depends on damage severity. Minor edge damage with healthy underlying soil can green up within a few weeks once spring rain flushes the salt through. More extensive damage that requires gypsum treatment and overseeding typically shows new growth in three to four weeks after seeding, assuming soil temperatures are adequate and moisture is maintained.
Winter salt lawn damage is a fixable problem, but only if you address the soil chemistry first. Flush the salt out, neutralize what’s left with gypsum, then reseed with varieties that can handle annual exposure. Skip any of those steps and you’ll be back in the same position next spring — staring at the same brown patches and wondering what went wrong.
Where to Buy
This article was written with AI assistance and editorially reviewed.
Source: Tom's Guide