


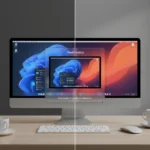
Bambu Studio Color Mixing is a new slicer feature that lets users blend two or three filaments of the same material type to create custom colors and gradients without swapping spools. Released in version 2.5.3, the feature automates what was previously a manual, time-consuming process, making multi-color prints faster and more accessible to hobbyists and professionals alike.
Key Takeaways
- Bambu Studio v2.5.3 introduces Color Mixing, blending 2-3 filaments via thin alternating layers for optical color effects
- Supports Bambu Lab printers including A1, P2S, and X2D; multi-nozzle printers recommended for efficiency
- Access via “Add Mixed Filament” button in the slicer; works with Bambu Lab CMYK filament kit for wide color range
- Best results on near-vertical walls; not recommended for sloped surfaces or top/bottom layers
- Community testing shows 2-filament mixes produce clearer colors than 3-filament combinations
How Bambu Studio Color Mixing Actually Works
The feature uses thin alternating layers of different filaments to create optical blending, similar to how inkjet printers mix CMYK inks. When you click “Add Mixed Filament” at the bottom of the filament list, a dialog opens where you select two or three filaments of the same material type—PLA with PLA, for example, not PLA with PETG. The slicer then lets you adjust the ratio between colors using a color bar, color triangle, or direct ratio input, or you can pick from a grid of recommended color combinations.
Once you’ve created a mixed filament, it appears as a new virtual color in your filament list. You assign it to model parts just like you would a regular filament, and the slicer handles the layer-by-layer assignment automatically. On multi-nozzle printers like the X2D, the new Filament Track Switch feature reduces waste by dynamically mapping which nozzle handles each color transition, cutting down on flushing.
The feature also includes a Gradient mode for smooth color transitions across a single plane, giving you more creative control over the final appearance.


Bambu Studio Color Mixing vs. Manual Multi-Color Printing
Before version 2.5.3, multi-color printing in Bambu Studio required manual filament changes at specific layers or heights, or painstaking color painting in the slicer. That approach was tedious and prone to errors. Color Mixing automates the entire process, calculating optimal layer heights and filament ratios to achieve the target color without user intervention.
The practical difference is significant: a complex gradient that once took 20 manual steps now takes seconds to set up. For users with single-nozzle printers, however, the trade-off remains real—frequent filament changes and material waste are unavoidable, making multi-nozzle systems like the X2D or P2S much better suited to this workflow.


Recommended Settings and Limitations
Bambu Lab recommends a 0.4mm nozzle with a base layer height of 0.12mm and mixed layer height of 0.2mm for best results. Extreme layer height ratios should be avoided to prevent melt fracture, where the filament tears under pressure. The feature works best on near-vertical walls; sloped surfaces and top/bottom layers produce poor visual results because the thin alternating layers become visible rather than blending optically.
Two-filament mixes consistently produce clearer, more vibrant colors than three-filament combinations, which can appear muddy or muddy in community testing. If you’re new to Color Mixing, starting with two colors is the safer bet. Also, never attempt to mix incompatible materials—PLA and PETG, for instance, won’t bond properly and will produce weak, unusable prints.
Community Roots and Open-Source Acknowledgment
Bambu acknowledges that the color prediction algorithm behind Color Mixing is based on the OrcaSlicer-FullSpectrum fork, a community-driven project that pioneered this blending approach. This transparency reflects the broader 3D printing ecosystem, where open-source tools often inspire commercial features. The CMYK filament kit, compatible with Color Mixing, expands the palette significantly, enabling prints with a much wider range of hues on a single plate.
Is Bambu Studio Color Mixing worth using?
If you own a Bambu Lab multi-nozzle printer and want to explore multi-color prints without the complexity of manual filament changes, yes. The feature is free in v2.5.3 and genuinely reduces setup time. Single-nozzle printer owners should approach cautiously—the frequent changes and waste may outweigh the convenience.

What other features shipped in Bambu Studio v2.5.3?
Beyond Color Mixing, v2.5.3 introduced Filament Track Switch for dynamic nozzle mapping on multi-nozzle printers, Linear Fan Transitions for smoother cooling, new Fuzzy Skin modes (Perlin and Voronoi), tree support chamfers, wipe tower ironing, and ironing fan control. The update is a comprehensive refresh focused on print quality and workflow efficiency.
Can I use Color Mixing on older Bambu Lab printers?
The feature is compatible with Bambu Lab printers including the A1, P2S, and X2D. However, multi-nozzle printers deliver the best results. Single-nozzle models can technically use Color Mixing but will require frequent filament swaps and generate significant waste, making the experience less practical than on newer multi-nozzle systems.
Bambu Studio Color Mixing is a genuine quality-of-life improvement for multi-color printing, automating a process that once demanded patience and precision. It won’t reshape your prints overnight, but it removes friction from a workflow that many users have avoided precisely because it was tedious. For anyone serious about exploring color on a Bambu Lab printer, it’s worth learning.
This article was written with AI assistance and editorially reviewed.
Source: Tom's Hardware